Administration Interface
Some of the data stored in the database is not frequently changed and is not intended to be accessed by all the users. For theses cases, the administrator should use the administration interface.
Log in screen
To enter the administration interface, you should type “/admin” after the base URL of NES. A login screen will be shows. Only users that has the flag Staff member” are able to log in (See Users).

Home screen
After login, the home screen will show a list of selected tables, which includes tables that store data that are read-only for most of the users, and tables whose changes are tracked and stored in auxiliary tables.
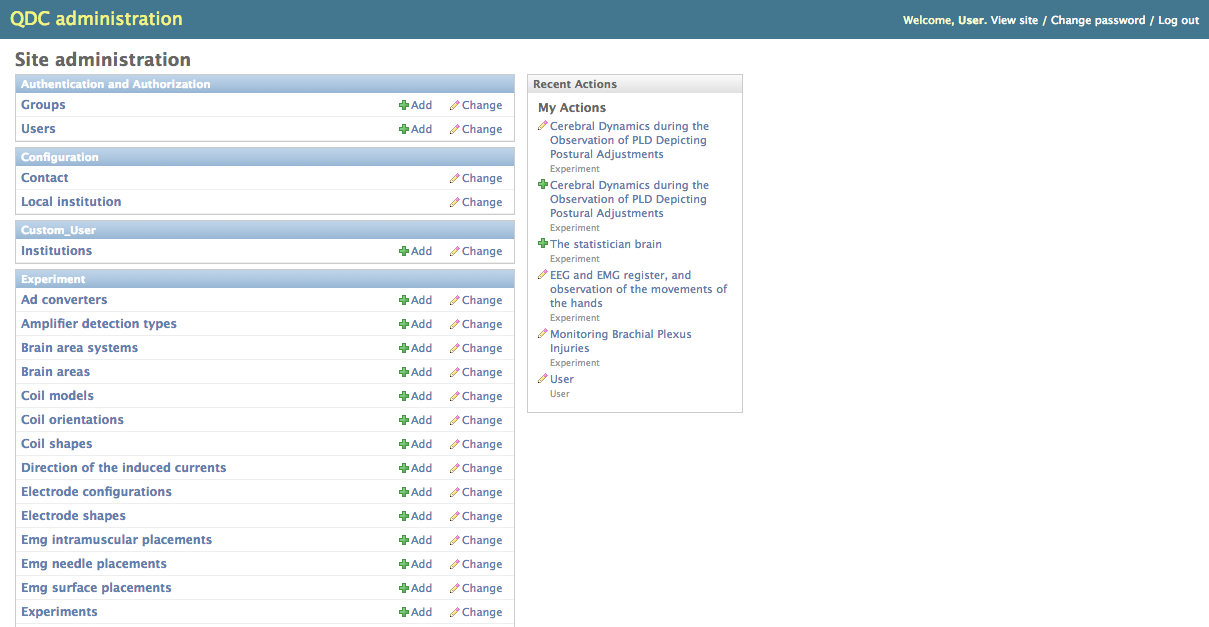
Users
Although it is possible to edit most of the user’s data using the regular NES interface, some data can only be changed through the administration interface:
Active flag: Indicates whether the user has access to NES.
Staff member flag: Indicates whether the user has access to the administration interface.
Superuser flag: Indicates whether the user has access to all functionalities of the system.
User’s permissions: A list of permissions that the user has no matter the groups s/he is in.
Read-Only Data
Some tables store data that are read-only for most of the users and therefore can only be edited using the administration interface. These tables are:
Group of users / Roles
Alcohol frequency
Alcohol period
Amount cigarettes
Flesh tone
Gender
Marital status
Payment
Religion
Schooling
Stimulus types
Historical Records
Some tables store data whose changes are tracked. You can only see the changes made in these tables using the administration interface. These tables are:
Experiments
Response to experiment questionnaires
Participants
Social demographic data
Social history data
To see the changes made in one of the records, first click the name of the table. If you click the link to the experiment table, for exemple, you will see the list of all experiments currently registered.
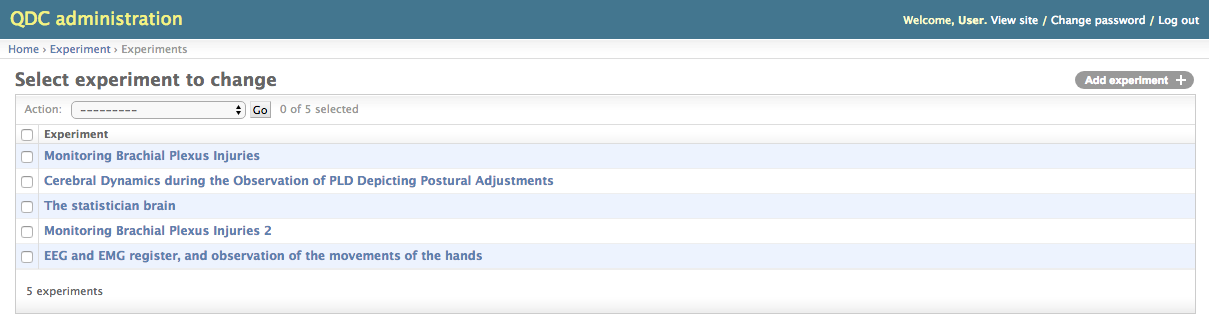
Then, you click the name of the record whose changes you want to see. Suppose you want to see changes in the experiment called “Touch Threshold and Referred Sensation in BPIs”.
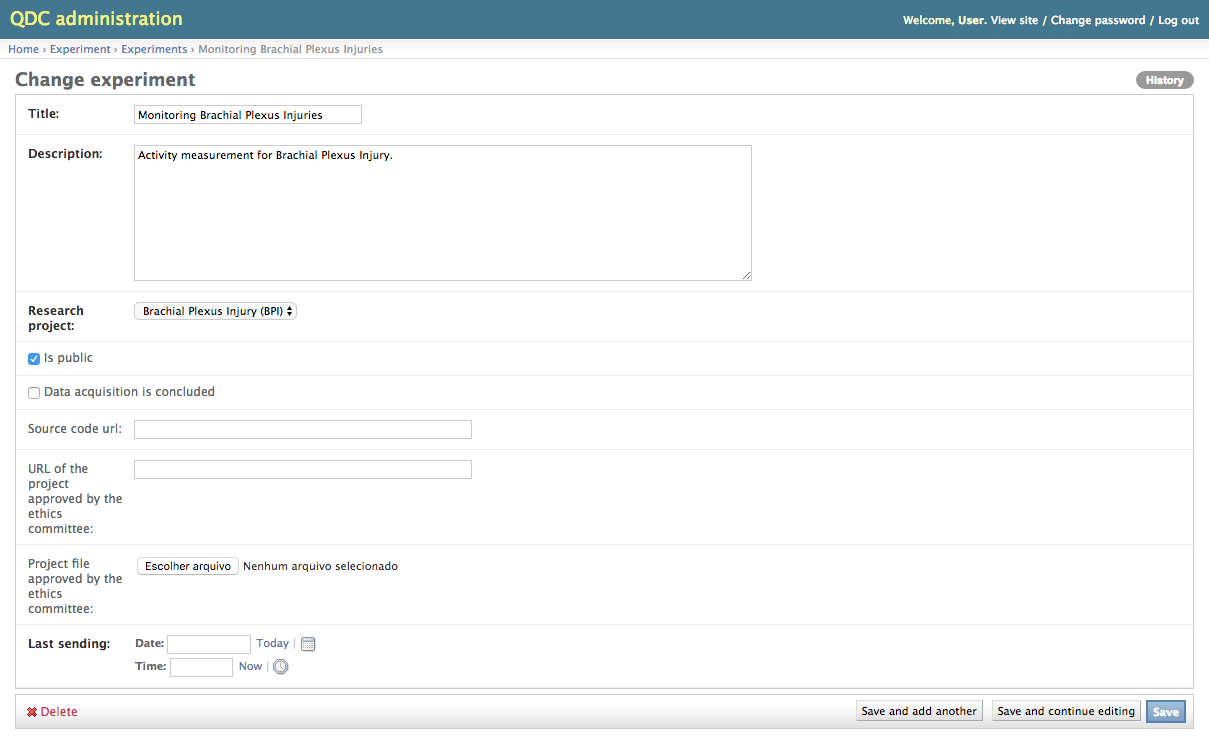
Then, you click the History button, in the upper-right corner of the screen.
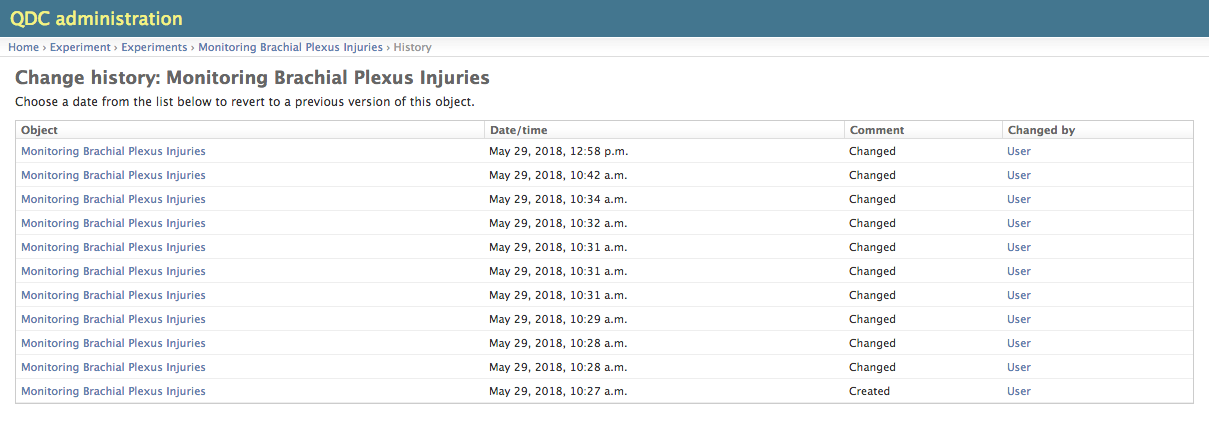
Each line of this list represents a version of the record. Clicking one of the links of the first column (the name of the experiment, in this case), you see information about this record at a specific point in time.